 Tue, Jan 5, 2010 |
 Sat, Jan 23, 2010 |
 Sun, Jan 17, 2010 |
 Sat, Jan 23, 2010 |
 Sat, Jan 23, 2010 |
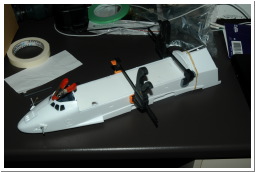
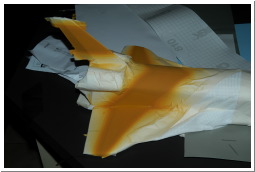
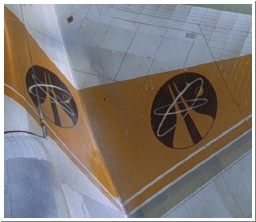
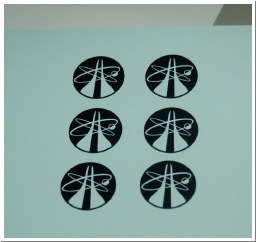
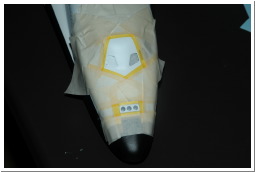
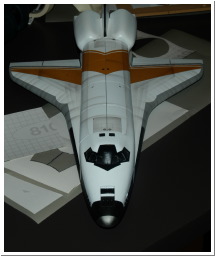
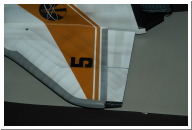
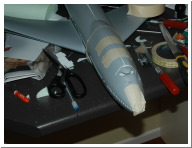
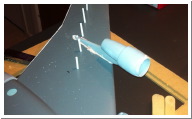
| Trying to keep everything straight while the glue dries - note the lack of tail-fin. It was so bent I chopped it off and replaced it with a new one. | I hate masking. The orange is tamiya flat yellow with a little red and hull red added. | blu-ray grab. Nice ref for the Drax logo. I think I got the orange colour pretty close. It'll look less "bright" once the panel shading is done. | decals... | masking the black for the tail |
 Sat, Jan 23, 2010 |
 Sun, Jan 24, 2010 |
 Sun, Jan 24, 2010 |
 Mon, Jan 25, 2010 |
 Mon, Jan 25, 2010 |
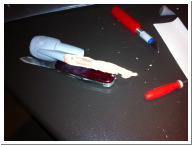
| practicing panel shading. Tamiya "Smoke" is my new favourite colour. | Did I mention that I hate masking | After spraying black... Need to remask wings for the grey leading edge. | Did I mention that I hate masking. Grey leading edge. | Unmasking is so much easier. |
 Mon, Jan 25, 2010 |
 Mon, Jan 25, 2010 |
 Sun, Feb 7, 2010 |
 Sun, Feb 7, 2010 |
 Sun, Feb 14, 2010 |
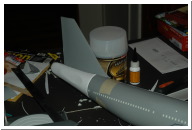
| Did I mention that I hate masking | One light coat of Future to seal the orange and grey. Next step panel lines and decals... | sketching onto masking film with a sharpie... Then I remove the film, scan it, redraw the lines in CAD, then cut masks for panel shading and printed decals on an alps printer... | starting panel shading and decals. | masking the wing leading edge for panel shading |
 Sun, Feb 14, 2010 |
 Sun, Feb 21, 2010 |
 Sat, Feb 27, 2010 |
 Wed, Mar 17, 2010 |
 Wed, Mar 17, 2010 |
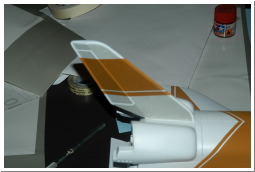
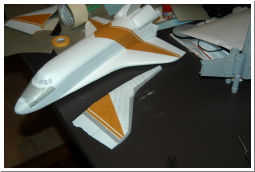
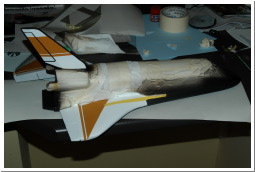
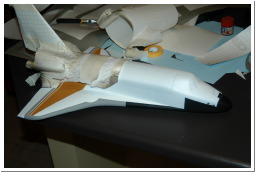
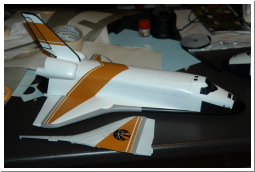
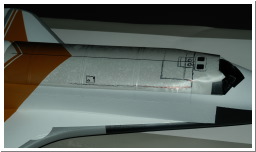
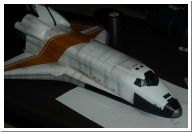
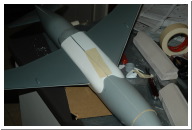
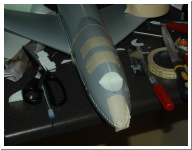
| not a lot of progress this weekend. Still need to plan out the panel masks for the fuselage sides and a lot more decals. | more shading and decals | more decals... non-flash picture shows panel shading is more subtle. Still need to shade the tail and nose and have lots of small decals to add. | getting closer but... | decided to bite the bullet and move the hatch back a few mm which will require some miliput and a bit of a repaint. |
 Sun, Mar 21, 2010 |
 Mon, Mar 22, 2010 |
 Mon, Mar 22, 2010 |
 Sat, Apr 3, 2010 |
 Sun, Mar 20, 2011 |
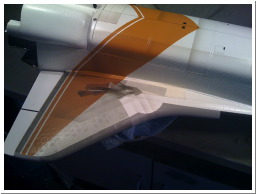
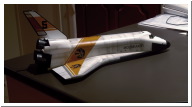
| some more decals. And some paint touchups required - the raised panel lines are a pain in the ass as paint creeps up under the masking. | and more decals | Some white line decals over tha black regions. Oversprayed with a mix of smoke, brown and black. | ||
 Mon, Mar 14, 2011 |
 Sat, Mar 19, 2011 |
 Sun, Mar 20, 2011 |
 Sun, Mar 20, 2011 |
 Sun, Mar 20, 2011 |
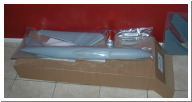
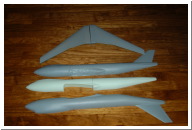
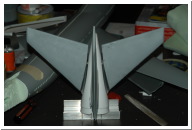
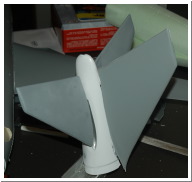
| 1/72 vacuform 747 kit from Hannants in the UK. Fuselage is 1m long (39") | To help align the 2 fuselage halves and provide support I cut a foam insert (green part) which fits inside the vacformed fuselage shell | foam fuselage plug finished | foam provides support for wing roots as well. | wing test fit. I've seen injection moulded kits which require more filling |
 Sun, Mar 20, 2011 |
 Sun, Mar 20, 2011 |
 Sat, Mar 26, 2011 |
 Sat, Mar 26, 2011 |
 Sat, Mar 26, 2011 |
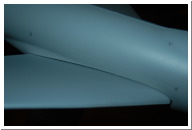
| Foam insert also provides strength to support the shuttle which will live on the back. | engines are made from 2 vacformed halves with resin intakes and exhausts. | hmmm... fuselage seems to be missing the distinctive bulge under the wing roots - which makes me think this was scaled up from the old airfix kit. | Adding the "bulge" with a vacformed piece | |
 Sat, Mar 26, 2011 |
 Sat, Apr 2, 2011 |
 Sat, Apr 2, 2011 |
 Sat, Apr 2, 2011 |
 Sat, Apr 9, 2011 |
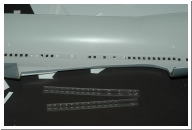
| Now it looks a bit more like a 747 | cutting windows - have to do it in 3 sections to fit in the mill. | Now - just have to do the other side... | why can't I just leave things alone - I seem to have chopped out the cockpit | |
 Sat, Apr 9, 2011 |
 Sat, Apr 9, 2011 |
 Sun, Apr 10, 2011 |
 Sun, Apr 10, 2011 |
 Sun, Apr 17, 2011 |
| to replace it with this | I'll add some temporary window frames with styrene strip to make sure this looks correct. | v2 cockpit insert | with window frames | new fuselage tailsection. Note the flat spots. I'll need to build some sort of internal armature to support the tailplane. |
 Mon, Apr 25, 2011 |
 Mon, Apr 25, 2011 |
 Sun, May 8, 2011 |
 Sat, May 14, 2011 |
 Sun, May 15, 2011 |
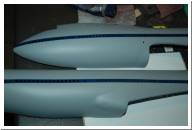
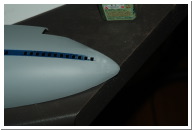
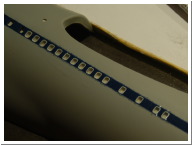
| clear acrylic windows... | blending the bulge at the rear of the wings | painted the blue cheat line since I'll need to install the clear windows before sealing up the fuselage. Mental note: don't ever use that brand of masking tape with tamiya spraycans again :/ | ||
 Mon, May 16, 2011 |
 Tue, May 17, 2011 |
 Sun, Jun 5, 2011 |
 Sun, Jun 5, 2011 |
 Sun, Jun 5, 2011 |
| Just noticed the Meddings miniature is missing the front two windows. So plugged the holes with styrene. Probably a good thing since the curvature is quite tight and getting the acrylic windows to fit flush was proving difficult. | ignore the bad paint masking but this is just a mockup of the glass, internal frame and a white line decal to see what the end result will look like. I'm now confident that this will actually work. | blacking out the windows from the inside | recess in the foam plug for windows and 1st class cabin | wall anchors epoxied into the foam - these are used to secure the wing |
 Mon, Jun 6, 2011 |
 Sun, Jun 19, 2011 |
 Sun, Jun 19, 2011 |
 Sun, Jun 19, 2011 |
 Sun, Jun 19, 2011 |
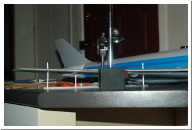
| This is ready to be sealed up... | wing jig...I'm using 1/8" solid rod inserted through holes in the upper and lower surface. | This alows me to get the wings level and symmetrical by setting the height of the top surface at each support. The rods are then glued in which provides support to keep the wings rigid. | gluing top to bottom. | Now the whole thing sits level on the 16 rods so I can get the fuselage and tail aligned with the wings. |
 Thu, Jun 23, 2011 |
 Sat, Jun 25, 2011 |
 Sat, Jun 25, 2011 |
 Sun, Jun 26, 2011 |
 Sun, Jun 26, 2011 |
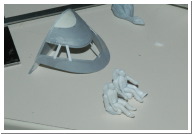
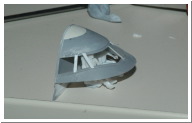
| a quick coat of primer on the engines to check the seams. | the "bondo squish". Bondo doesn't stick well to styrene so filling the engine pylon with bondo and pressing against the wing and letting the excess squish out results in a perfect impression of the wing surface. | "bondo squish" part 2. Pop the engine off, remove the excess bondo and file the edge flush with the pylon and you have a part which fits seamlessly to the wing. | Pilots. Modified from the payload specialist figure from the Revell shuttle kit. | |
 Sun, Jun 26, 2011 |
 Sun, Jun 26, 2011 |
 Mon, Jun 27, 2011 |
 Sat, Jul 9, 2011 |
 Sun, Jul 10, 2011 |
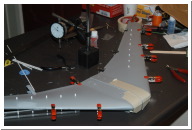
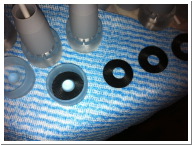
| need to figure out where the centre of gravity is for a mounting point - which means (temporarily) sticking it all together... | centre of gravity is just behind the wing root so.. epoxied a 5/8" brass tube in to the foam core so it can sit on a lighting stand. | some work on the engines | Dremelled out a channel in the front of the wings and filled with a strip of sheet styrene - this provides a secure flexible bond which minimun filling required. | vinyl detail for the wings. |
 Sun, Jul 10, 2011 |
 Sun, Jul 10, 2011 |
 Tue, Jul 19, 2011 |
 Sun, Jul 24, 2011 |
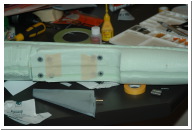
 Sun, Oct 2, 2011 |
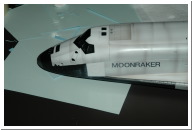
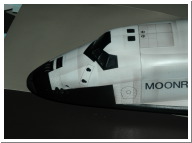
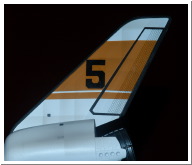
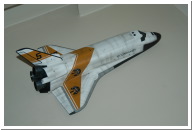
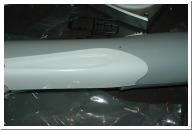
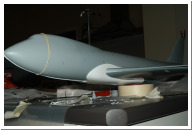
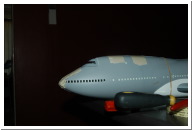
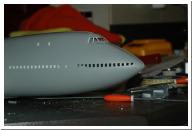
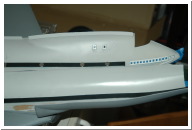
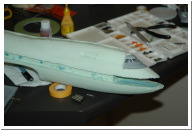
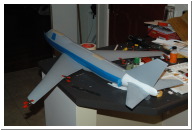
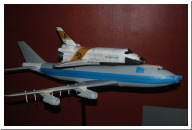
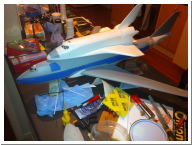
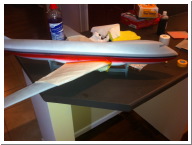
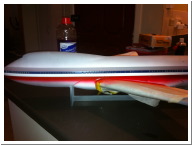
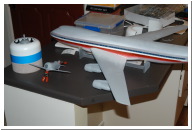
| This provides subtle detail and guides for scribing deeper lines. | I finally sealed up the fuselage halves and attached the tail. That's a Monogram shuttle from the full stack kit sitting on the back - so I'll be paintfing this one with no number to match the shuttle from the film. #5 will be attached to the launch stack | I'm pretty happy with the fuselage seams after filling and priming. Next comes the hard part. Have to permanently attach the wings which will make it a bit awkward to manuever and paint. | painting the red stripe - white and blue stripes are masked... | |
 Sun, Oct 2, 2011 |
 Sun, Oct 16, 2011 |
 Sun, Oct 16, 2011 |
 Mon, Oct 17, 2011 |
 Sun, Dec 11, 2011 |
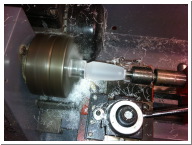
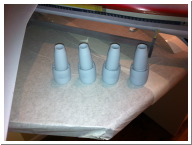
| Now I have the red I just need to mask off all 3 stripes before painting a black base coat... | turning some new engines from acylic | Engines x 4 | turbines... | Engines and pylons installed. Now I just need to get painting... |